User Management
Note: The user management feature can only be accessed in the portal if you have the following permission: 'Manage Users'.
If you don't use Single-Sign-On with Smart Knowledge Hub, the user data does not reside inside Smart Knowledge Hub. Instead, Smart Knowledge Hub uses Microsoft Azure Active Directory für securely storing the users identity.
As of now, Smart Knowledge Hub uses the existing Azure Active Directory administration to manage users.
To access Azure Active Directory administration, click on 'Advanced (External)' in the function bar.
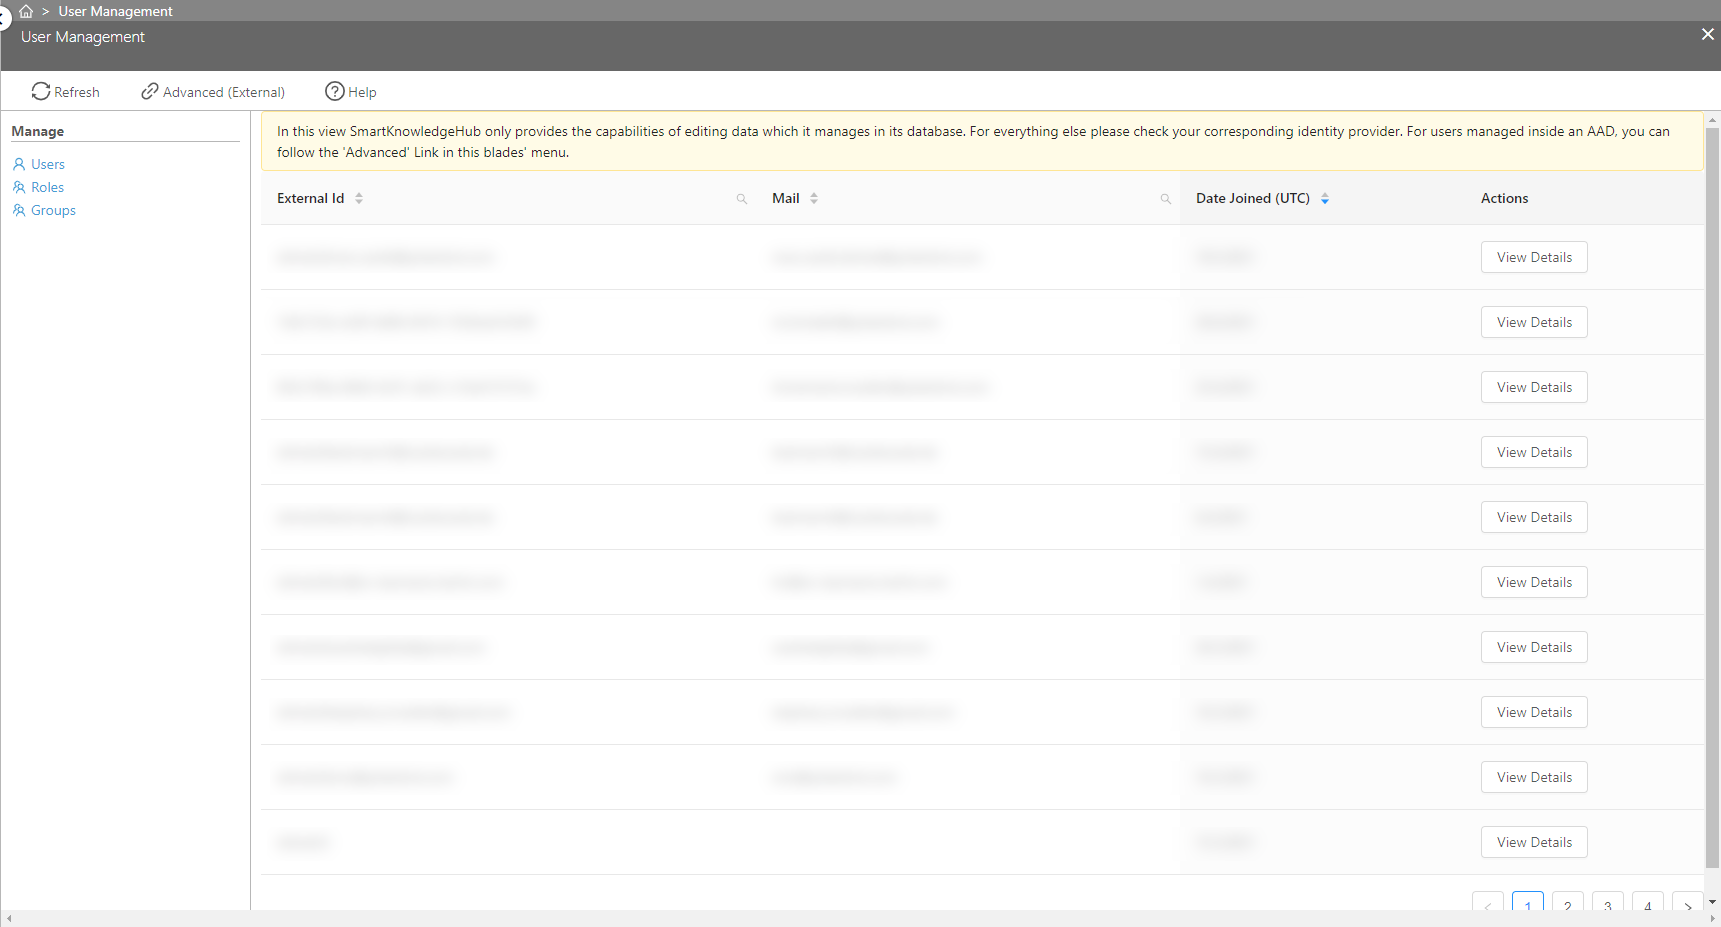
Note: The Azure Active Directory administration does contain a lot of more functionality than you need for Smart Knowledge Hub. Please stick to the elements referenced in this documentation to avoid confusion or misconfiguration!
Manage User Identiy in Azure Active Directory
Add new users, delete existing users or reset passwords from your Azure Active Directory administration.
External Users known as 'Guest Users' in the Azure Active Directory work out of the box. Please see the Azure Documentation for more information.
Add a new user
You can create a new user using the Azure Active Directory portal.
To add a new user
Select Users in the function bar on the left side and then select New user.
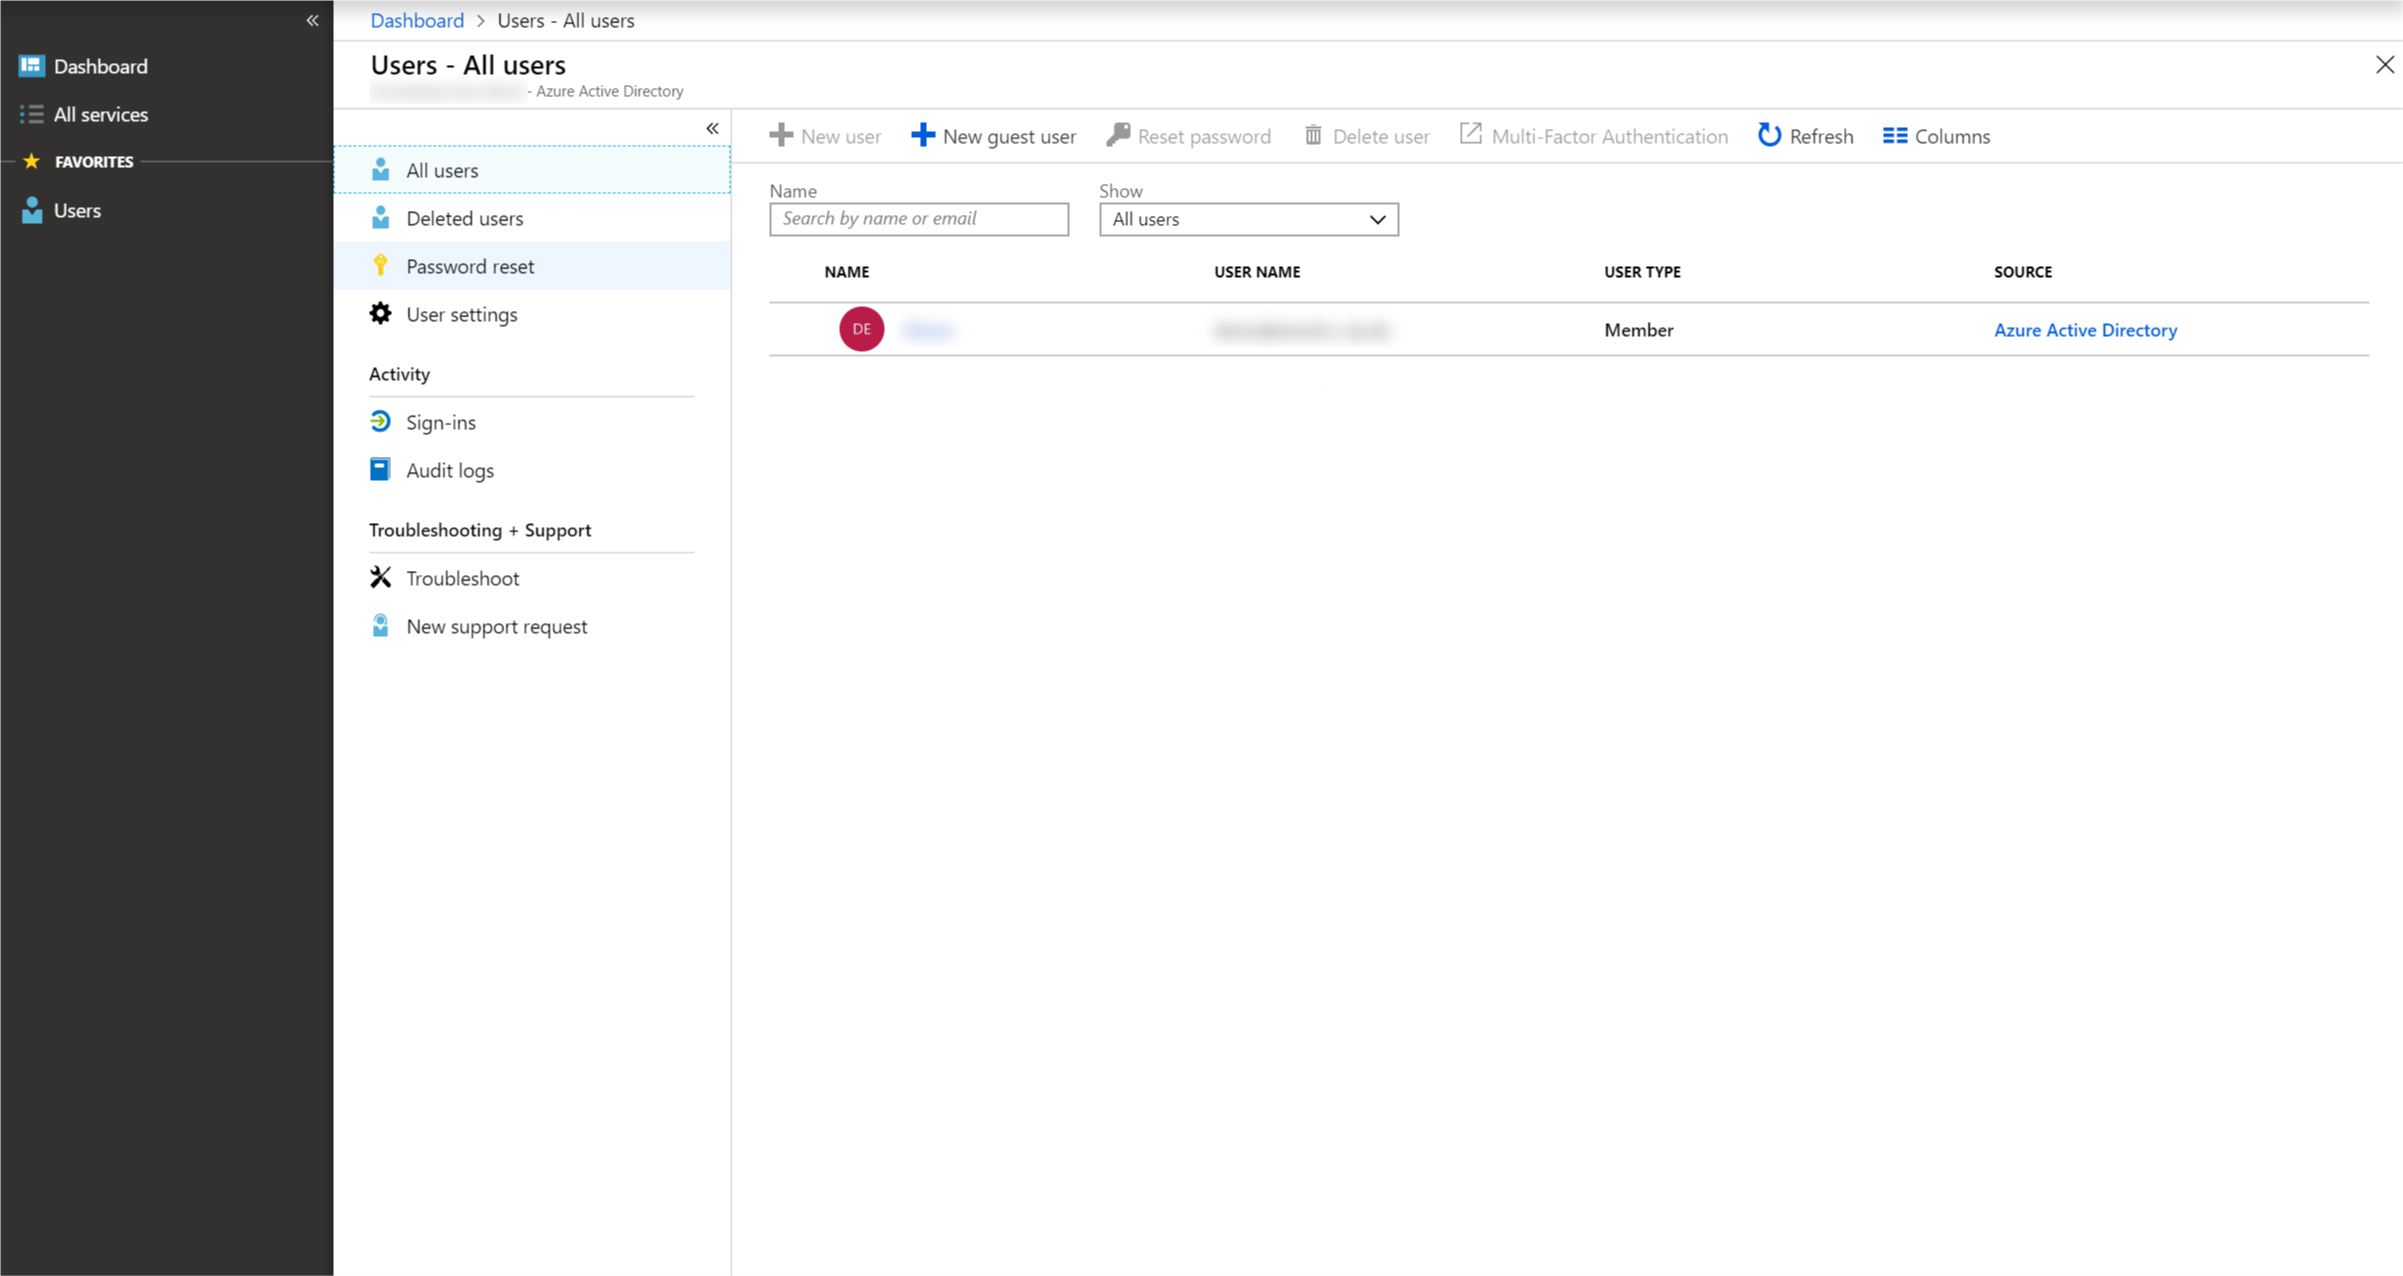
On the User page, fill out the required information.
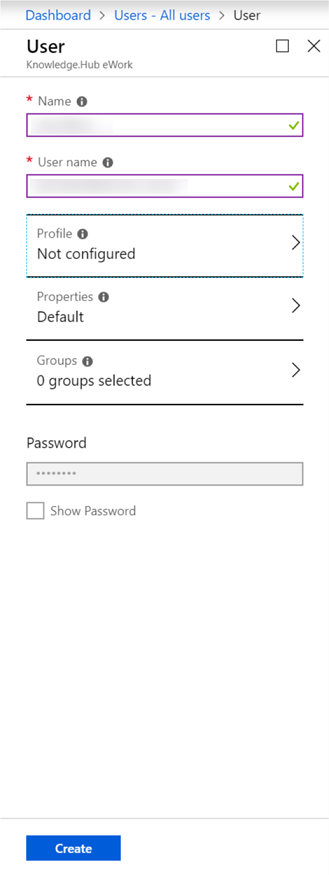
Name (required) The first and last name of the new user. For example, 'Jack Black'.
User name (required) The user name of the new user. For example, 'jack.black@ework.c-lp.de'.
The domain part of the user name must use the custom domain name, such as ework.c-lp.de. When Smart Knowledge Hub is set-up, a custom domain is assigned to your instance. Usually it is @[companyName].knowledgehub.cloud.
Profile Optionally, you can add more information about the user. You can also add user information at a later time. Smart Knowledge Hub does not use this information.
Groups Optionally, you can add the user to one or more existing groups. You can also add the user to groups at a later time. Smart Knowledge Hub uses its own group system and does not use this information.
Copy the auto-generated password provided in the Password box. You'll need to give this password to the user for the initial sign-in process. Click on 'Show Password' to see the password.
Select Create.
The user is created and added to your Azure AD tenant.
Delete a user
You can delete an existing user.
To delete a user
Select Users, and then search for and select the user you want to delete. For example, Jack Black.
Select Delete user.
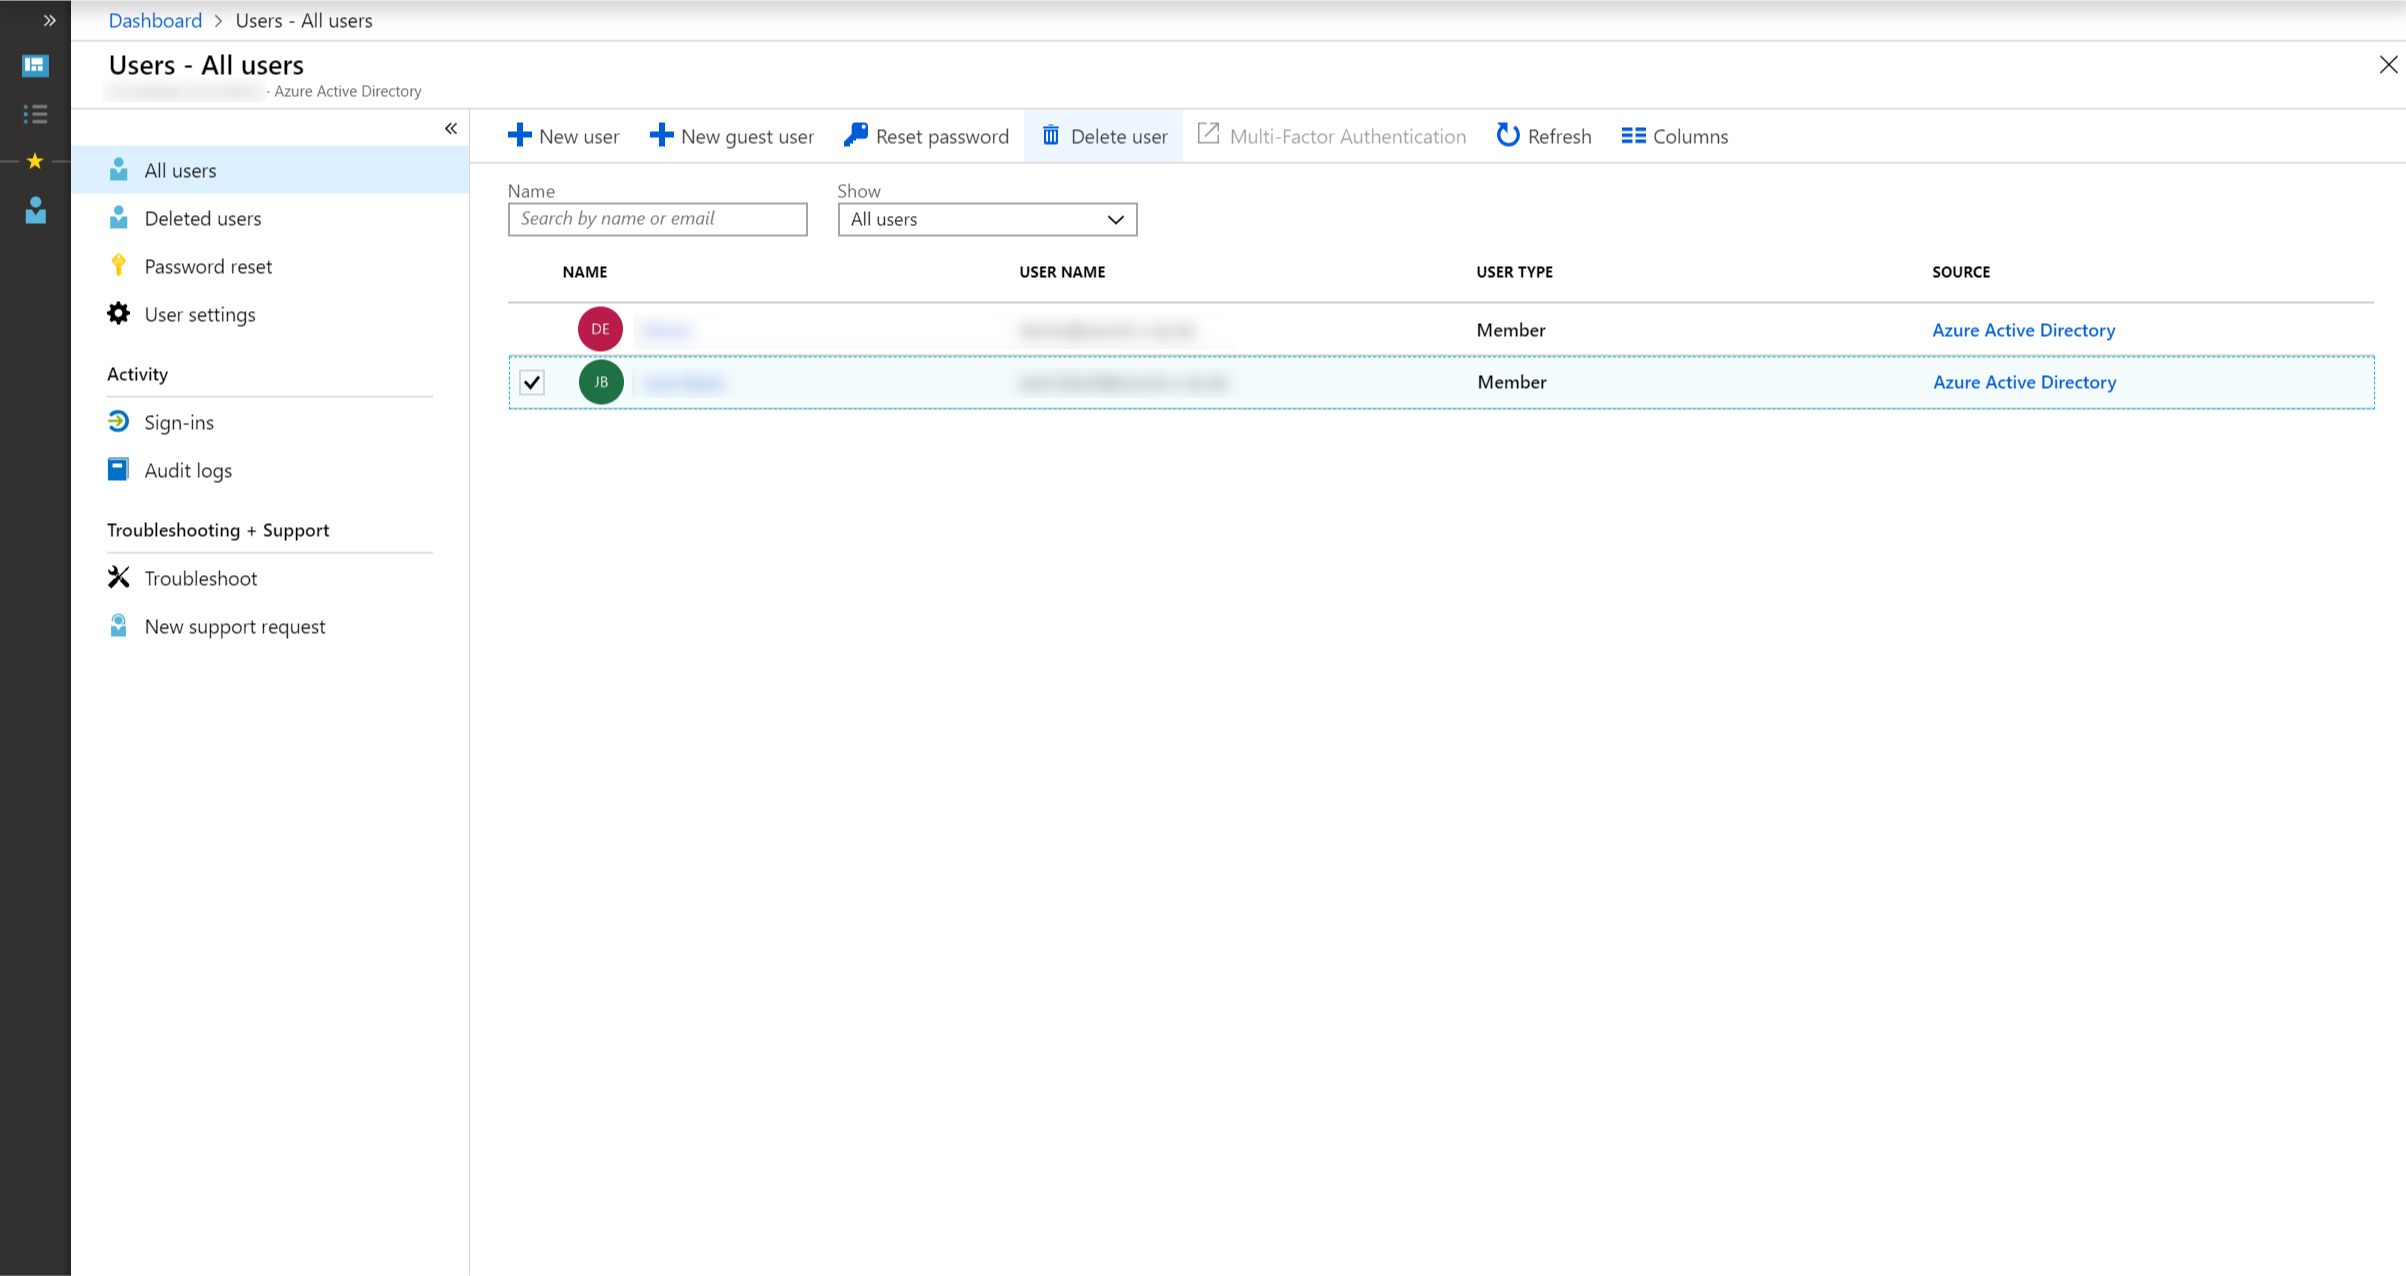
The user is deleted and no longer appears on the Users – All users page. The user can be seen on the Deleted users page for the next 30 days and can be restored during that time.
Reset a user's password using Azure Active Directory
You can reset a user's password if the password is forgotten, if the user gets locked out of a device, or if the user never received a password.
To reset a password
Select Users, search for and select the user that needs the reset, and then select Reset Password.
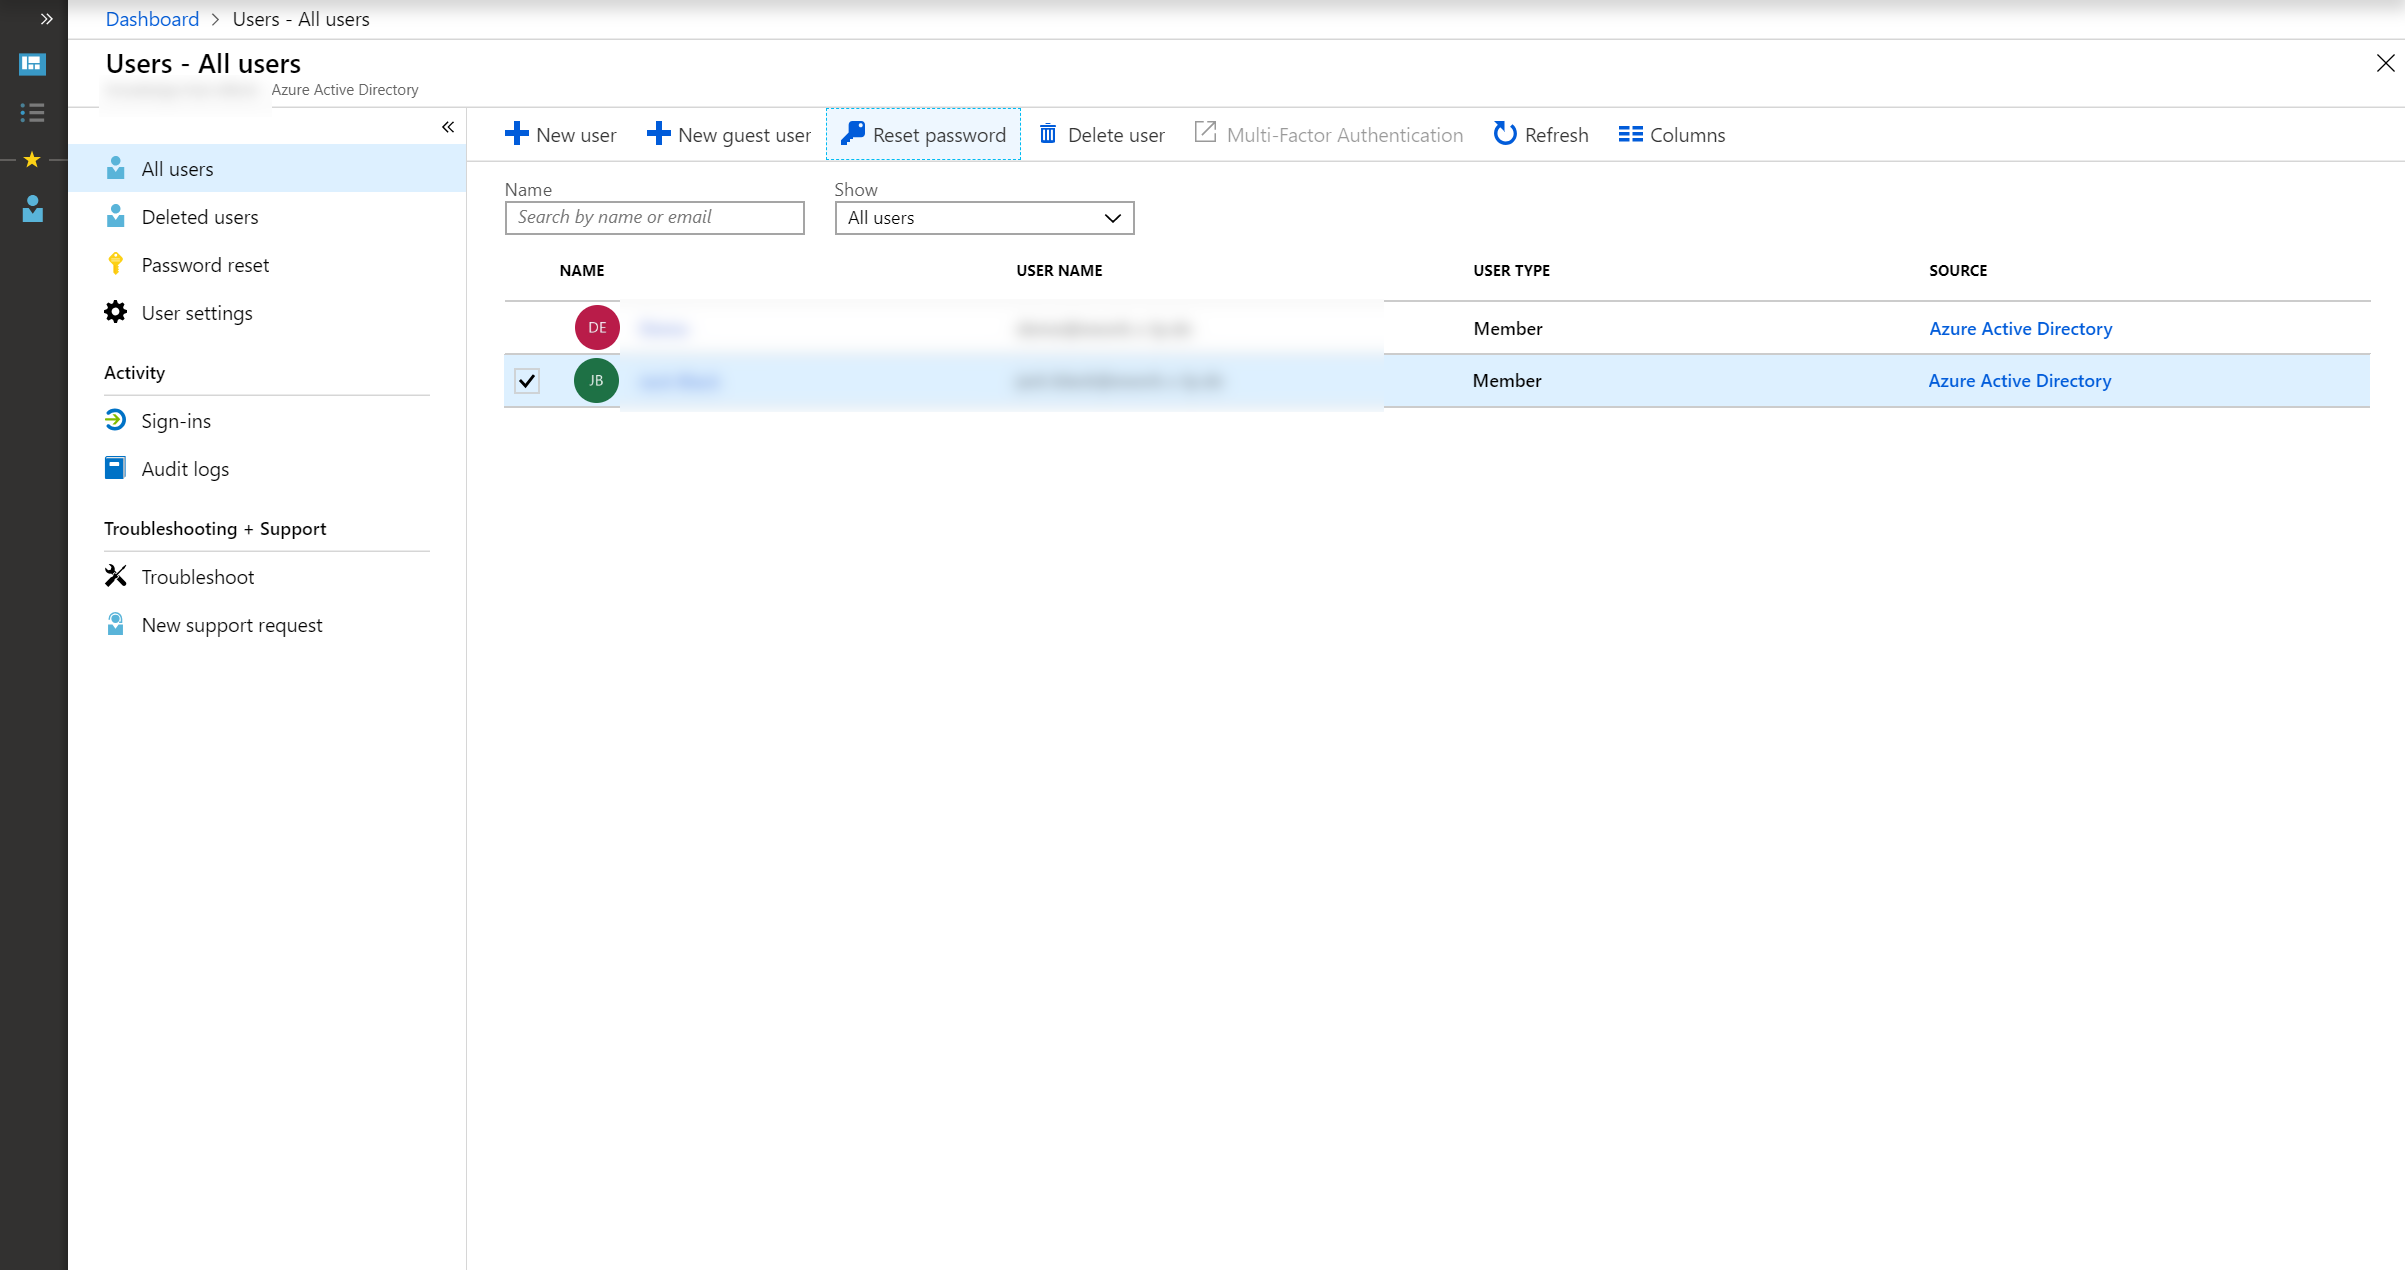
In the Reset password page, select Reset password.
A temporary password is auto-generated for the user.
Copy the password and give it to the user. The user will be required to change the password during the next sign-in process.
[!Note] The temporary password never expires. The next time the user signs in, the password will still work, regardless how much time has passed since the temporary password was generated.
Manage existing Users in Smart Knowledge Hub
Once a user has logged in successfully, he/she will be recognized within Smart Knowledge Hub.

In the 'Manage' bar on the left side, a selection can be made if you want to view/edit users, roles or groups.
Note: There are no passwords stored in Smart Knowledge Hub. If you don't use SSO, please refer to Reset a user's password using Azure Active Directory. If you use SSO, please contact your administrator to get information on how to change your password.
View profile
When the user logs in for the first time, Smart Knowledge Hub will register only two information elements for each user: External ID and email. The External ID is a unique reference for the particular user which cannot be changed.
Edit profile
As Smart Knowledge Hub uses external identity management — platforms such as Azure Active Directory or other systems that are bound via SSO (such as ADFS, Atlassian Crowd, etc.) — Smart Knowledge Hub recognizes the user's email address only once. So if the user's email address changes (for whatever reasons), you can change that in Smart Knowledge Hub.
1. Click on the user's email address to open the user profile.

2. To edit the email address, click on 'enable Edit Mode'.

3. You can now change the email address.
4. Click on 'Save' to save your changes. Exit the edit mode by clicking on 'Disable Edit Mode'.
Assign / delete user permissions
Note: To add/change permissions, you must have the "Permission management' permission assigned to your user.
Users can have various permissions and roles within Smart Knowledge Hub. To assign explicit permissions to the selected user, click on 'Security' in the 'Manage' bar.

The security details for the user will be displayed. Permissions can be assigned, roles have to be assigned using the Roles Overview.
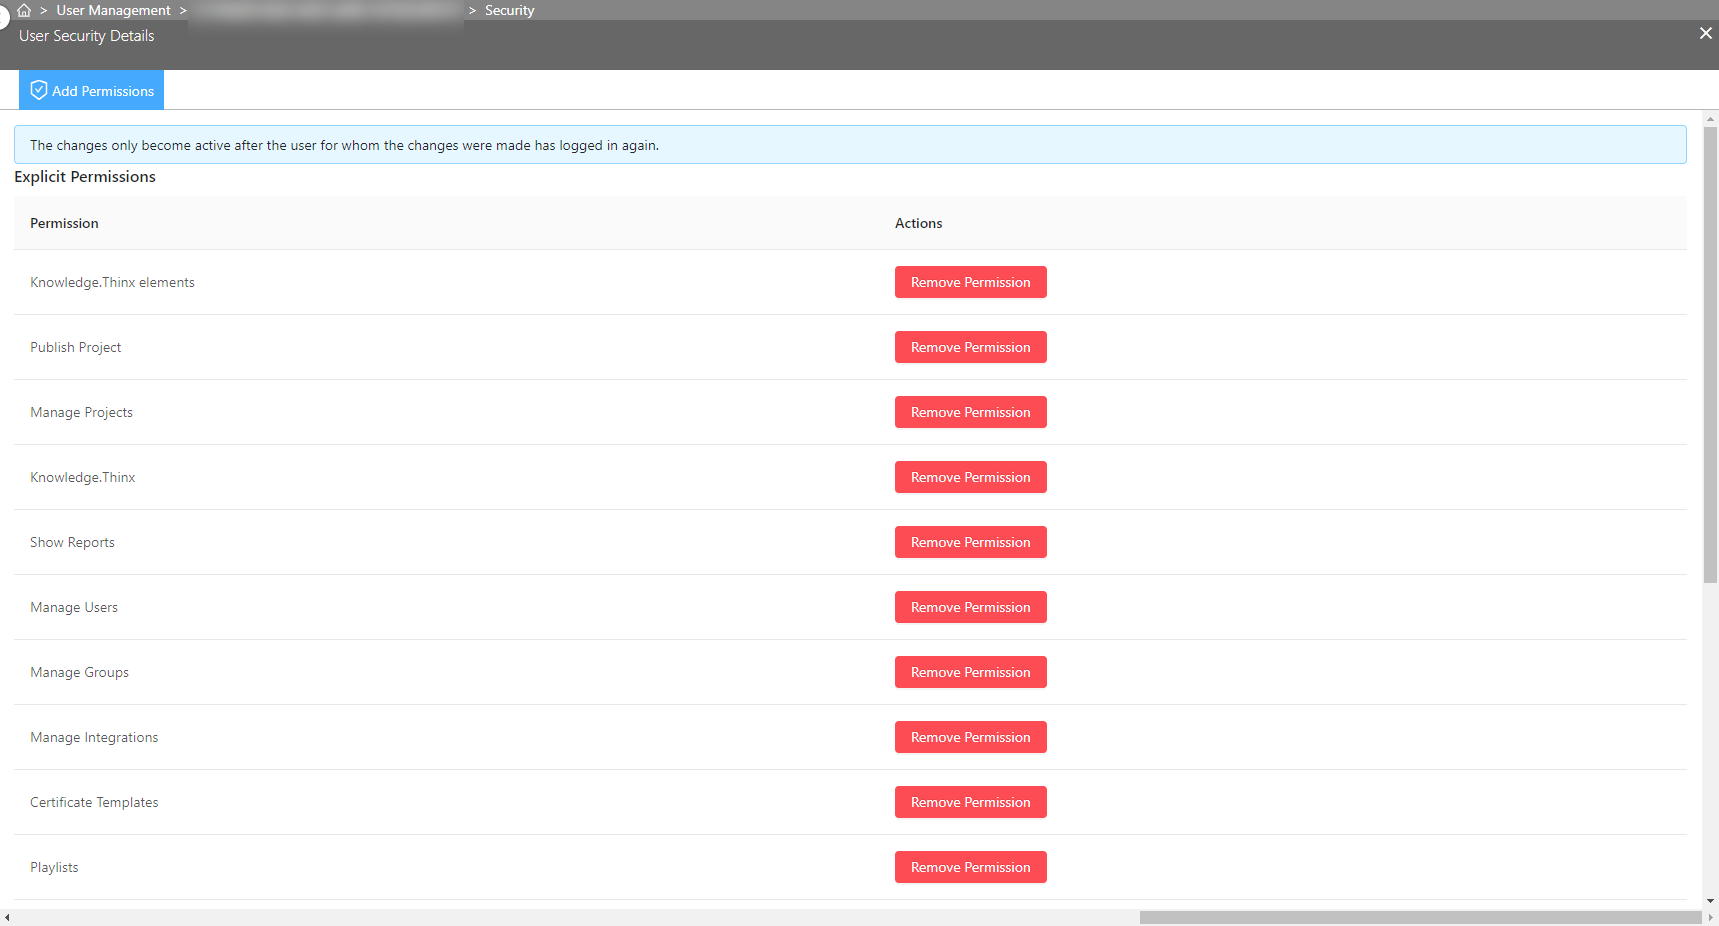
Add explicit permissions
To add a permission, click on 'Add Permission' in the function bar. The available permissions will be displayed in a new blade.
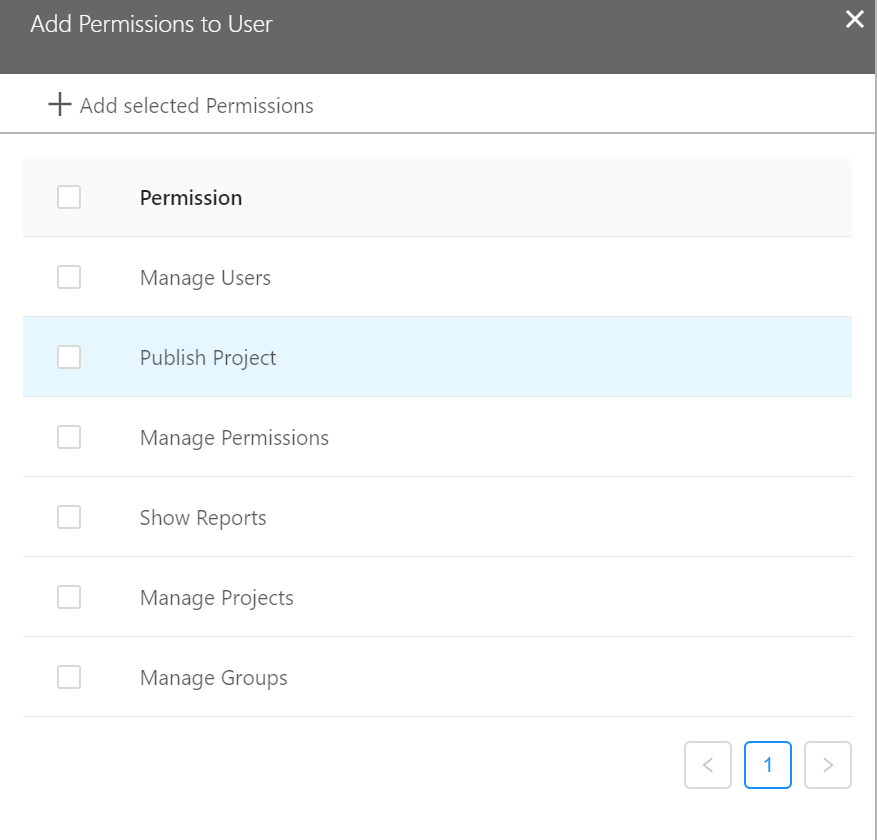
Select the permissions you want to assign and click on 'Add selected permissions'
Remove explicit permissions
To remove permissions, click on the 'Remove' button in the action column.

View roles
You can see the Roles information within the user security details blade. To see more information click on 'Details'.

The details blade will display information on the role in general, how often the role is assigned and if there's a limit on how much users can assigned to that roles. This is usually the case with authoring roles.
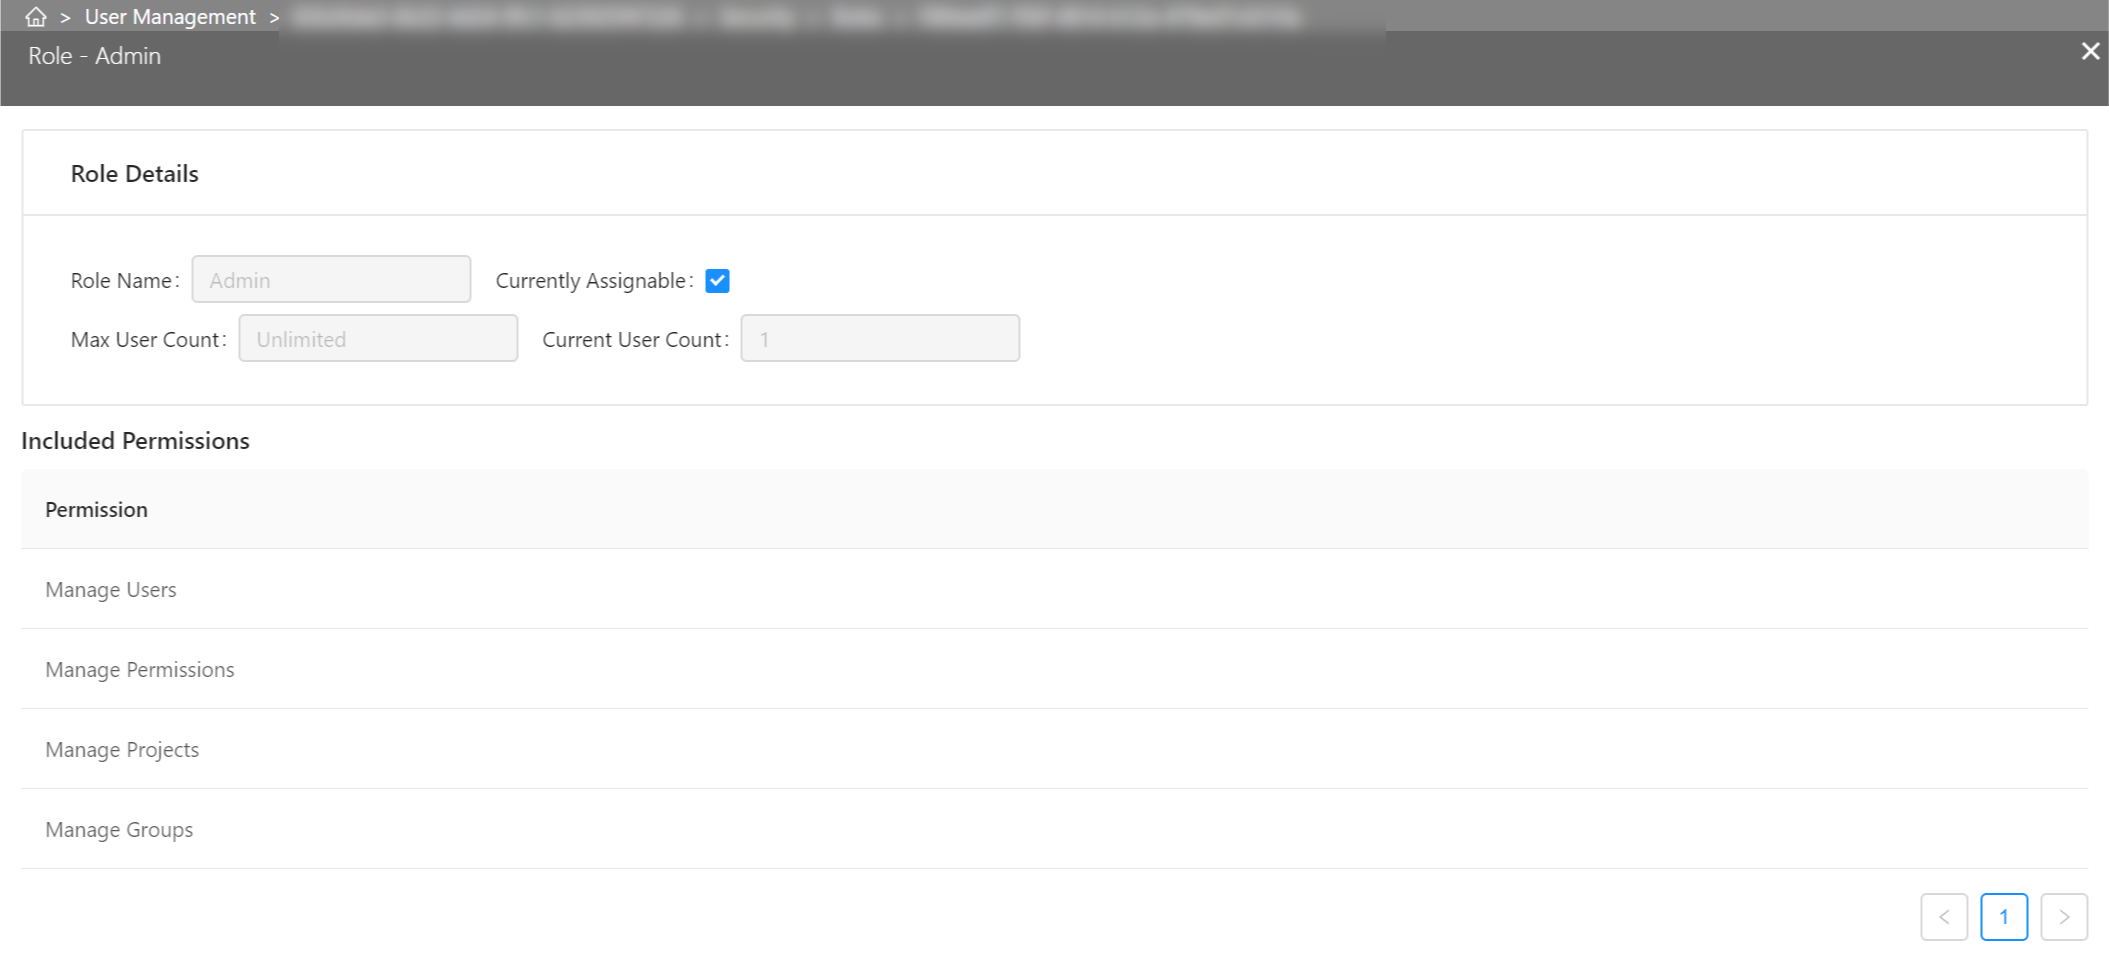
Included Permissions show which permissions are included in the selected role.
Remove roles
To remove a role, simply click on 'Remove Role' in the Action column.

Using the Permission Helper
After clicking on 'Permission Helper' in the 'Manage' bar, you can see a list of all Projects, Elements and Playlists.
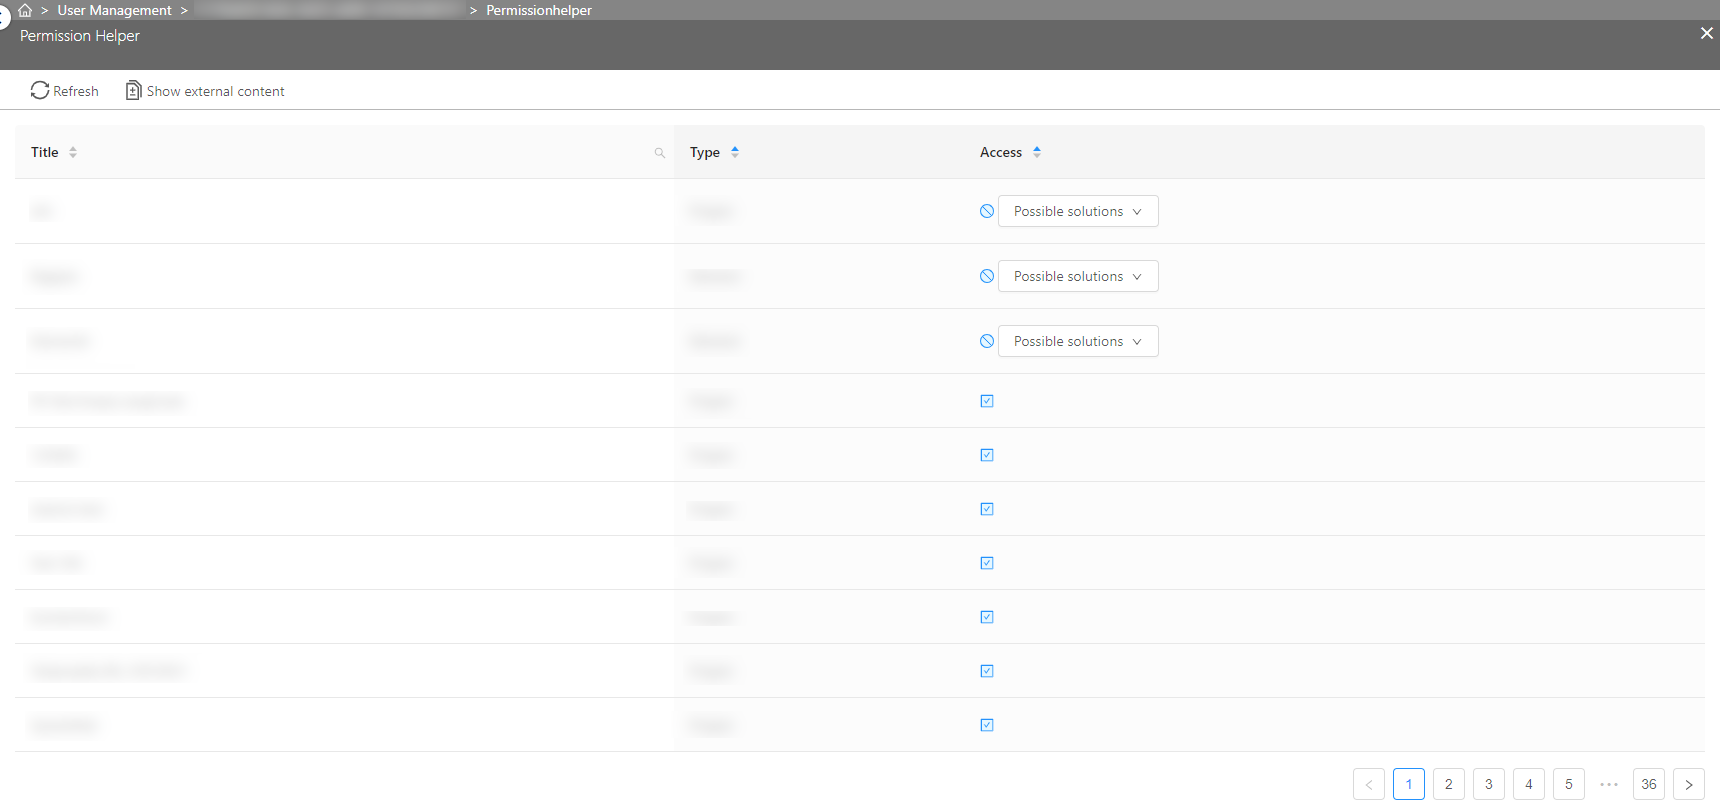
The Access column tells you if the selected user has the permissions to access the corresponding content item:
- A checkmark tells you that the user has access to it.
- A stop icon tells you that the user cannot access it. The reason for this can be:
- the user is not a member of a group that has access to it or
- the content item is not assigned to one of the user's groups.
If you have the 'Manage Groups' Permission, you will see a Dropdown field next to the stop icon that allows you to add the user to one of the groups to get access.
Please note that adding a user to a group may give him access to more than one content item, so many entries in the list may change at once if you make changes here.
If you do not have the 'Manage Groups' Permission, please hover the stop icon to see how a person could do if he/she had this Permission.
View and delete learner records
Note: Refer to Edit profile to see how to get here.
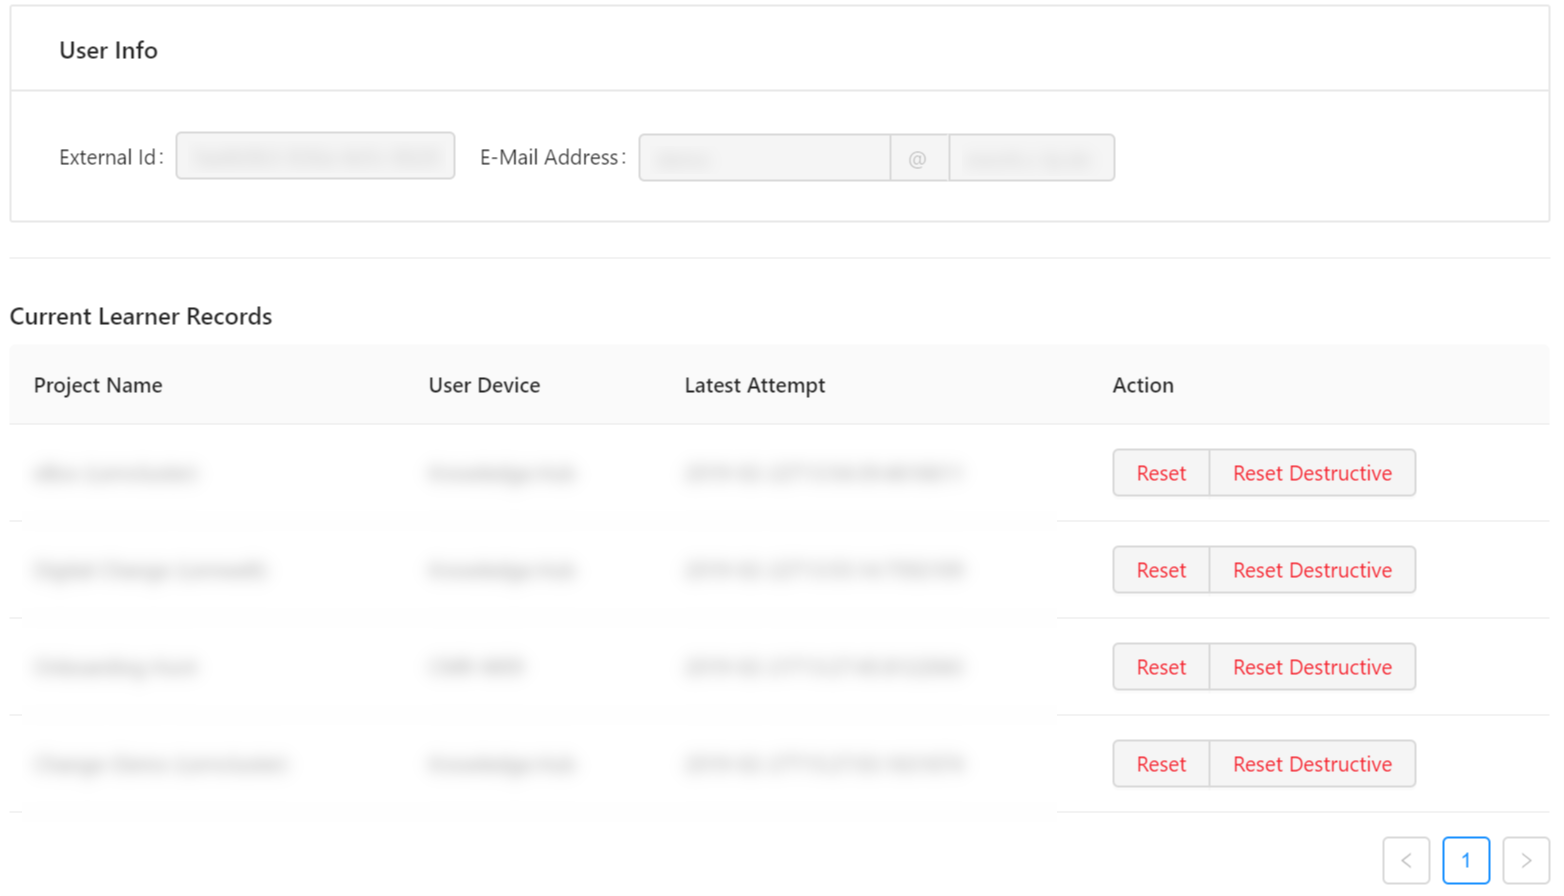
You can get an overview of all learner records for the selected user in the 'Current Learner Records' list.
| Column | Description | |
|---|---|---|
| Project Name | The title of the project the user has generated the learner record for is displayed here. | |
| User Device | If the user worked within the web Version of Smart Knowledge Hub, the User Device will be 'Smart Knowledge Hub'. If he/she used the app instead, the device name on which the app was used on will be displayed here. | |
| Last Attempt | The timestamp of the last attempt is shown here. | |
| Action | There are two actions that can be invoked:
|