Project Management
The Smart Knowledge Hub Project Management includes the management of SCORM packages of WBT content.
Note: The project management feature can only be accessed in the portal if you have the following rights: 'Manage Projects'.
Click on 'Project Management' in the feature selection.
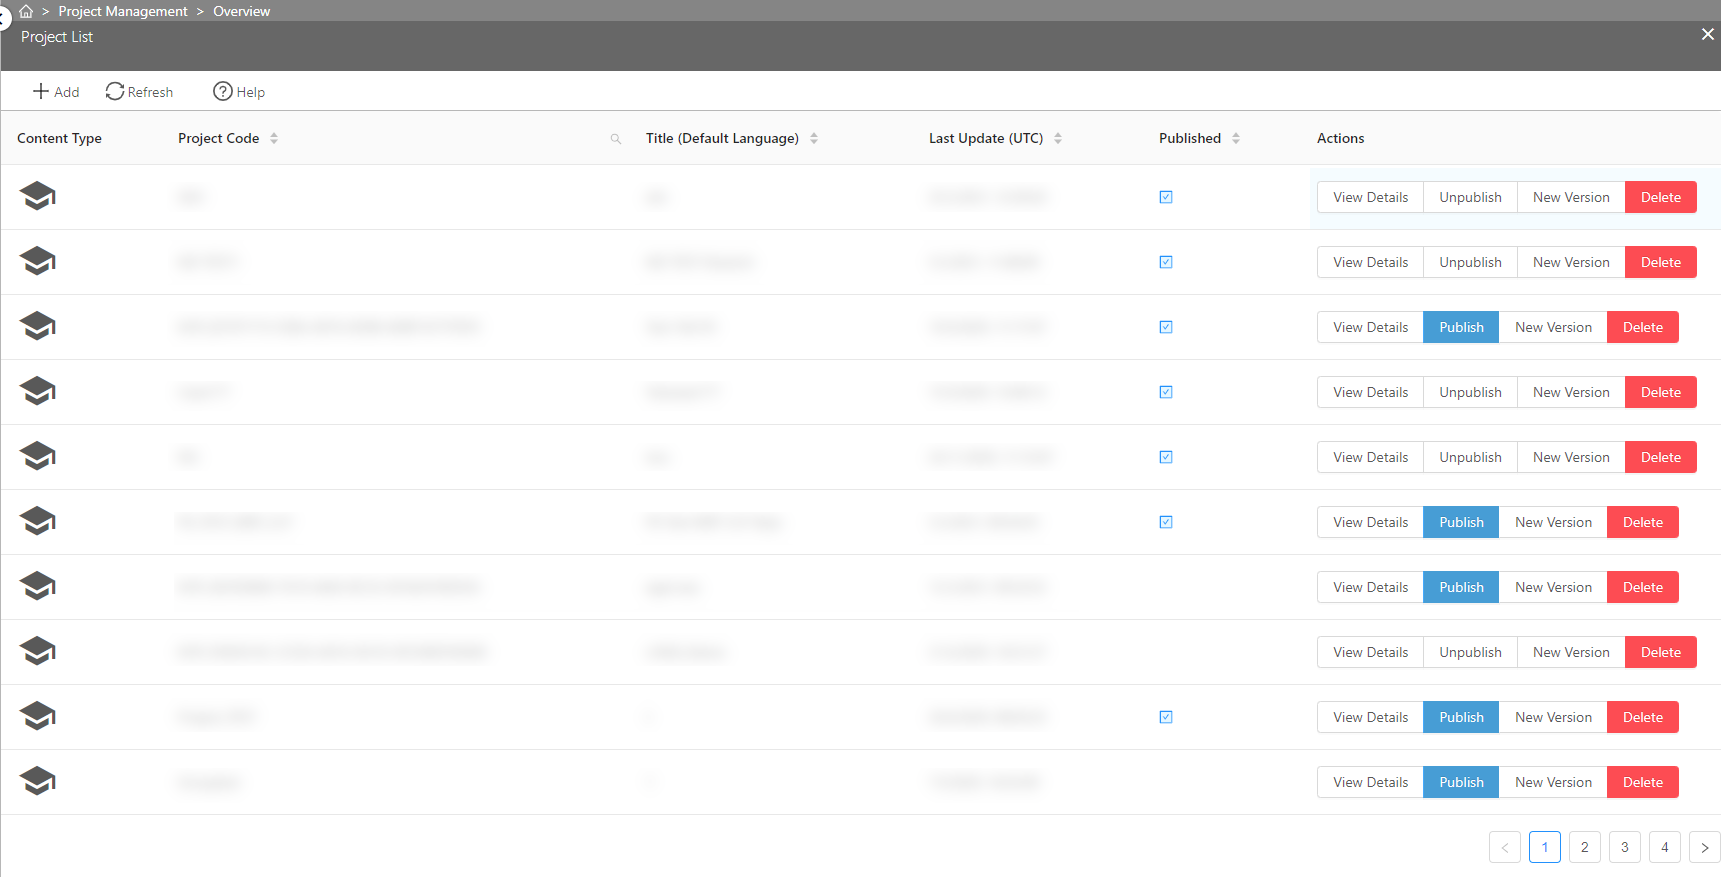
On the left side of the Project Management, you can see the entry 'Projects'. When entering this blade for the first time, you see a list of all projects for your organization, including a project code, title, the date of last updatee and an actions column where you find different actions for each of the projects.
Above the project list, you can find buttons for adding new projects, refreshing the project list and opening this help.
Add new project
Note: Some features for a project can only be accessed after the project has been created sucessfully. This chapter describes only the steps that you need to create a new project; for other properties, you have to edit your project after creation.
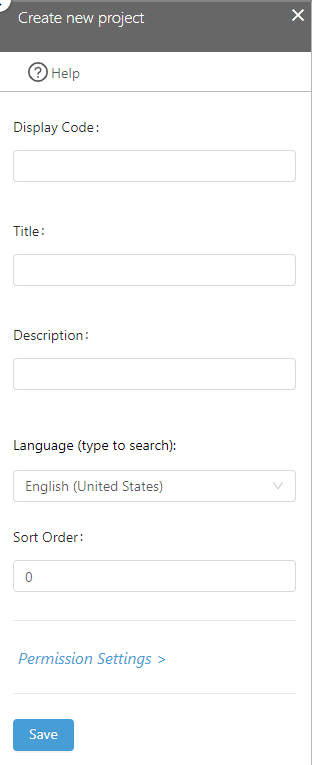
To add a new Project, simply click on '+Add' in the upper function bar. A new blade to the right of the Project list will be opened that contains the following fields:
Note: When you have created a Project, it is not visible in the Smart Knowledge Hub Frontend. You first need to add content and publish the project!
| Field | Description |
|---|---|
| Display Code | This is an identifier that is just used within the project management and lets you identify your project later. |
| Title | This is the Title of the Project that will be shown in the Frontend Application. |
| Description | This is the Description of the Project that will be shown in the Frontend Application. |
| Language | This is the Language of the Project that can be used for filtering in the Frontend Application. |
| Sort Order | This number indicates in which order the projects shall be presented to the end-user later: Small numbers will be shown on top, large numbers at the bottom, folder are shown on top of projects. If projects share the same Sort Order, the order between each other of these will be chosen randomly. |
Note: You can add a tile image in the details after you have created a new project. SVG, JPG, PNG and GIF files are supported here. For pixel formats, we recommed a resolution of 500x500 pixels. Tiles will be scaled automatically.
Please note that approximately 15% of the upper part may be covered by elements of the graphical user interface, such as status indicator and language selection.
Please note that you need to add content settings for each of your projects that contain SCORM content for this Project after creating it.
Edit an existing project
For editing, select a project from the Project list blade by clicking on the 'View Details' button in the 'Actions' column.
This will lead you to a new blade with four menu entries on the left side: 'General', 'Content', 'Certificate' and 'Group Permissions'.
Withing these menu entries, you can edit all properties of the project that you were able to edit during content creation, plus some more.
General
In addition to the creation process, you can add information about the calculation the completion status.
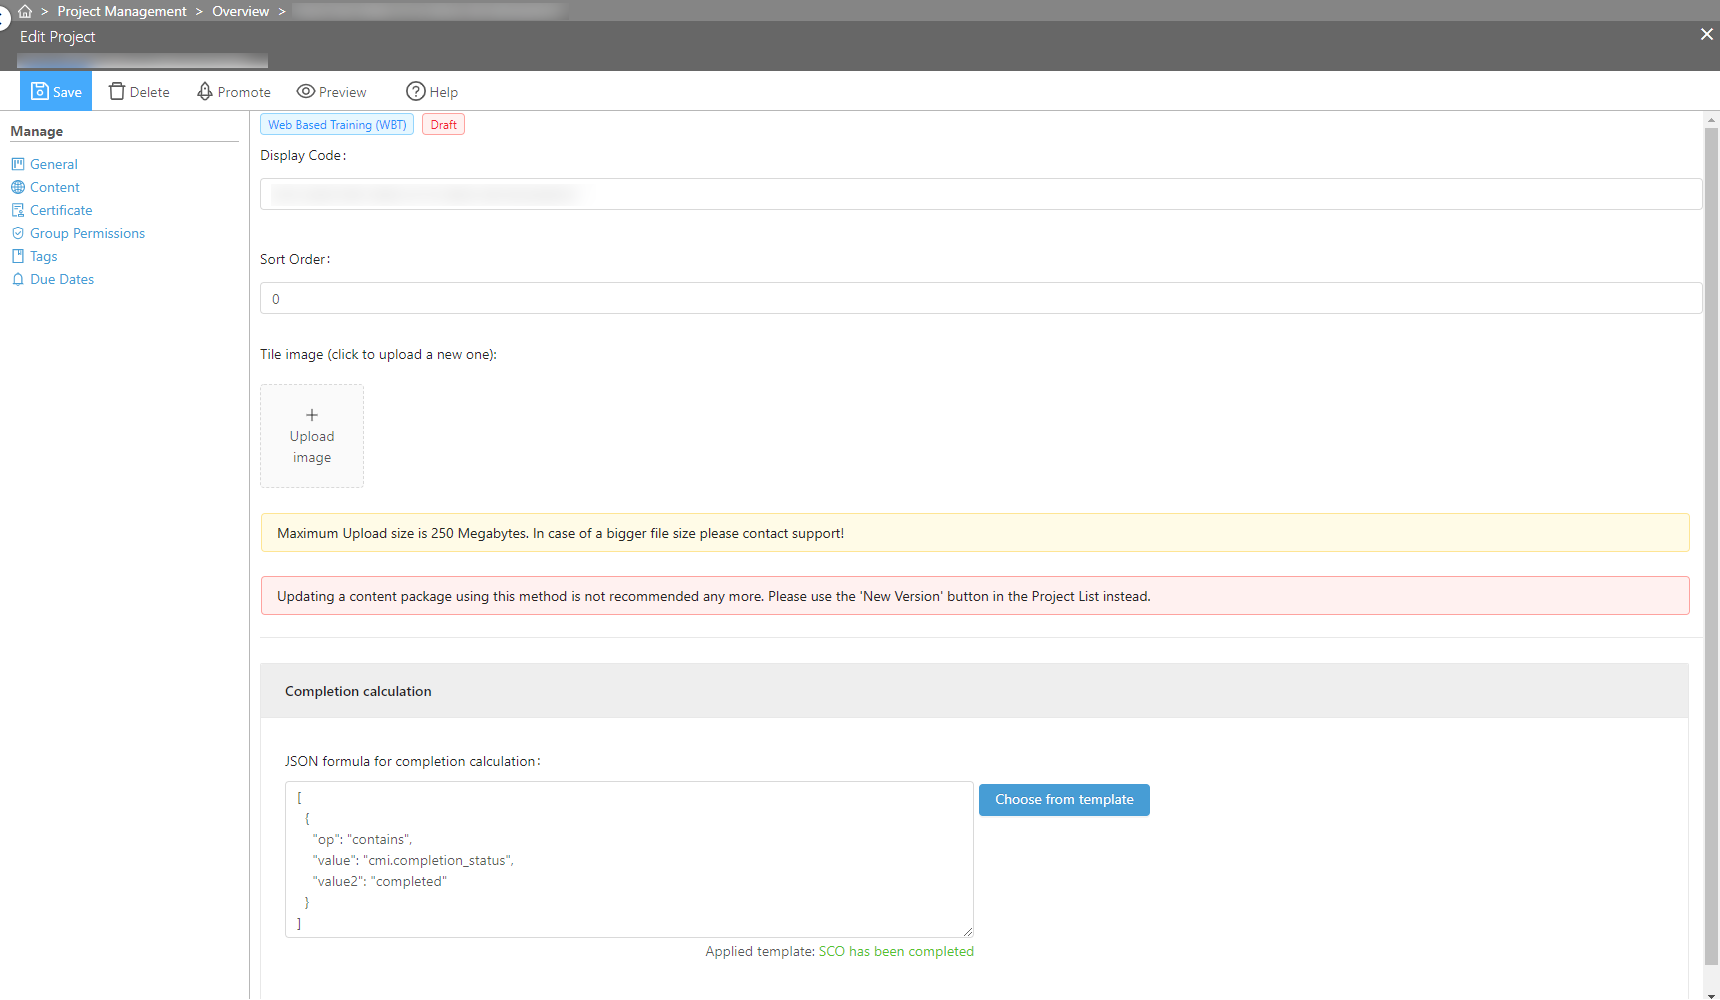
For the formulas — a very advanced topic —, please refer to Formulas. If you leave them blank, the completion status will not be presented to the end-user.
Please note that there are templates for the completion calculation you can choose from. Only the producer of your SCORM package knows which template you must choose here. Please ask the producer of the SCORM package if you have any questions about it.
Content settings
Note: Smart Knowledge Hub supports SCORM 2004 compatible WBTs. In short: We do not support SCORM 2004s sequencing and navigation features and will ignore the Manifest completely — this will also not be supported it in the future. Details about this can be found here.
To upload new SCORM compatible content or replace an old version, just drag the SCORM .zip file onto the 'Upload content' button. You can also click on the button to get a file selector and upload your content using this. The file will then be uploaded, unpacked and the content will be distributed within Smart Knowledge Hub. If you are replacing an old version, just mind the version field below the 'Upload content' where you can change this value.
Don't forget to change the 'Launch Url' to the start page of your recently uploaded content.
Note: Per default, the 'Launch Url' is set to index.html.
Please note that you can try to parse the SCORM manifest inside the SCORM content package to retrieve the Launch Url from there. To that end, please find the button corresponding to this function to the right of the field 'Launch Url (path of the file to be started)'. This button, or rather this function only works if the content has been uploaded before and you have waited some additional seconds for the content package to unzip on the server. Otherwise, the parser will return a 'file not found' error.
Custom Properties
A few fields below the 'Upload Content' button you can also find an editor for custom properties for the language. These properties are beyond the scope of this document.
They can be used by systems that can be connected to Smart Knowledge Hub, e.g. interfaces to other software of our customers that need to recieve information about learning progress.
Certificate settings
If you want Smart Knowledge Hub to issue a certificate after the end-user completed the training course, click on 'Certificate settings'. You can choose a certificate template from the list of the templates you created before. Click on 'Select' to save your decision.
You can change the template later when editing the project.
Note: At the moment it is only possible to choose a certificate template from the details of the content! To add a template please click on 'View Details' and the select 'Certificate' in navigation on the left side of the blade.
Please refer to Certificates for details on how to create a certificate template.
Permission settings
When you create a new project, this project is visible to all end-users by default and you have to set permissions for this content to restrict the visibility.
Please see Project permissions for more details
Group projects using Tags
Smart Knowledge Hub offers a function to group projects by taging it with Tags. For a detailed description on 'Tags' please refer to Tags.
To add a Tag to a Project, simply click on 'View Details' of a project and select 'Tags' from the left menubar.
In the following blade, you can add Tags. You can select Tags simply by clicking on the input field. It is also possible to search for specific items by entering at least one digit and to create new Tags simply by entering the specific word in the input area of Tags.

Due Dates
You can define a Project to be mandatory for specific users and/or groups using 'Due Dates' from the left menu bar.
Please note that 'Due Dates' is disabled until a Certificate Template has been defined for the Project.
Define Groups
Use the 'Groups' tab to define the Groups for which the Project should be mandatory, using the 'Add Groups' and 'Remove Groups' button in the top menu.

Define Users
Use the 'Users' tab to define the Users for which the Project should be mandatory, using the 'Add Users' and 'Remove Users' button in the top menu.

Define a default Due Date for new assignments
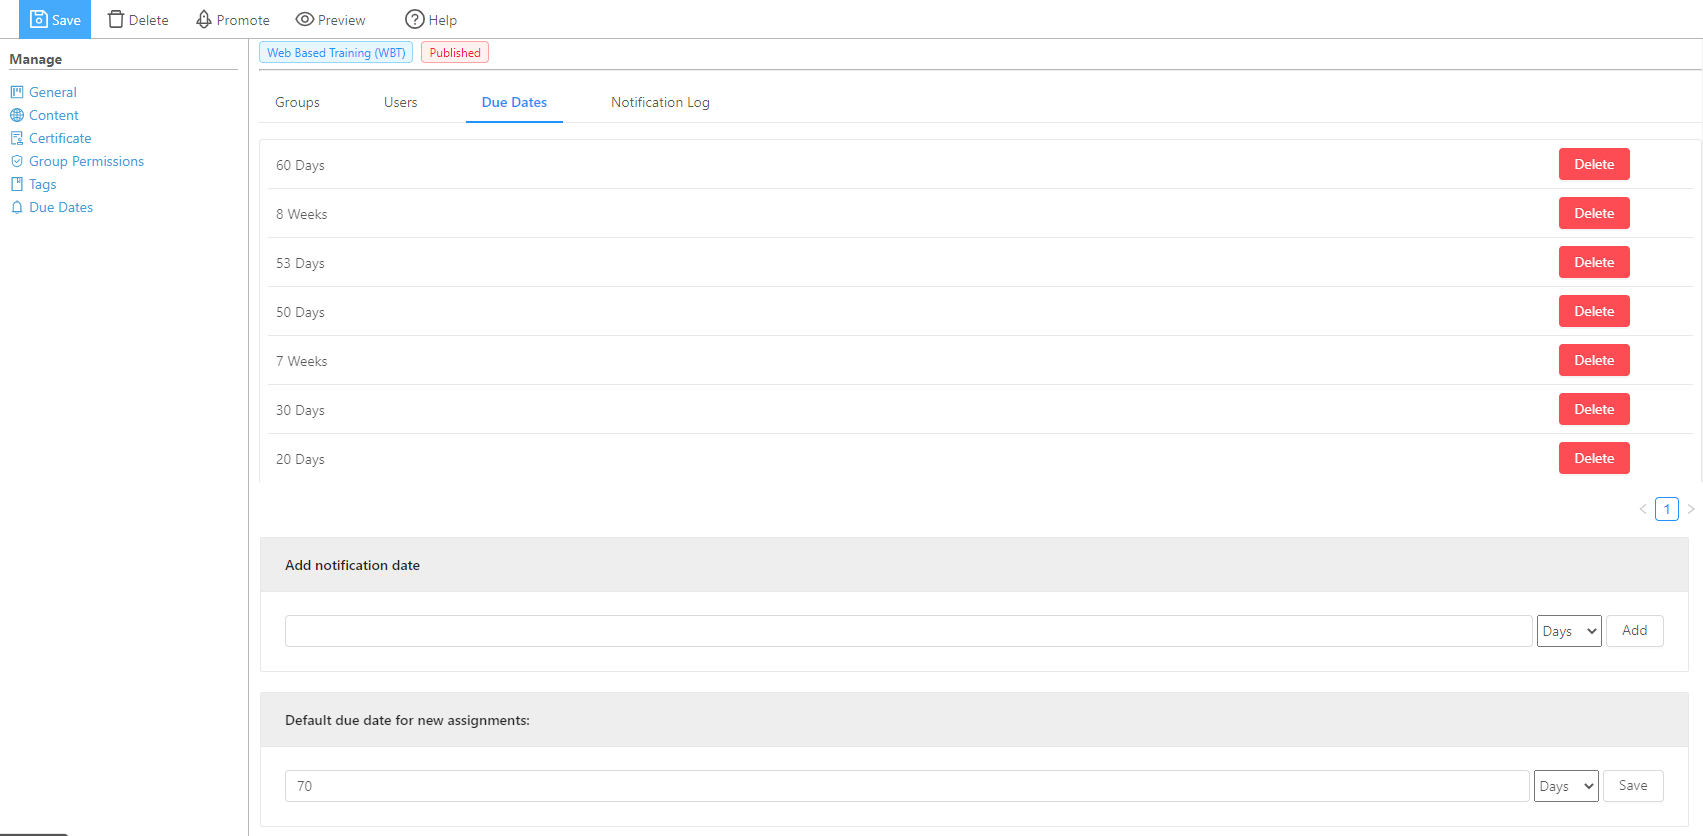
By default, users are expected to renew their Certificates until the certificate expires. If users did not receive a certificate for a specific Project before, they are expected to finish the Project and receive a certificate within a brief timespan, called 'Default Due Date'.
Please use the 'Default due date for new assignments' field in the 'Due Dates' tab to define it.
Define Notification Dates
Use the 'Add notification date' field in the 'Due Dates' tab to add notification dates. Smart Knowledge Hub will send mails to the users this timespan before the certificate or the default Due Date expires.
Please note that users can set their mail address and preferred language in the frontend settings. They can also deactivate to receive any mail notifications from Smart Knowledge Hub.
Check Notification Logs
Use the 'Notification Log' tab to see the status of the notifications. Use the Eye-Button in the rightmost column to view details.

Notification mails will be sent once a day at 9:30 am UTC.
Publish a Project
To publish a Project, just click on 'Publish' in the Action-Column of the project from the Project List.
Note: You have to upload at least a first version of your content if you want to publish a project! If you haven't uploaded something, you won't be able to publish!
Unpublish a Project
If you want to remove a project from the Smart Knowledge Hub Frontend, simply click on 'Unpublish' in the Action-Column of the project from the Project List.
Project permissions
Add permissions
Viewing Permissions can be set for every project and only groups can be assigned. Once at least one permission is set, the project is only visible to members of the group(s) that are assigned to this project.
1. To assign permissions, click on 'Group Permissions' from the left menu.
2. A new blade will show all currently assigned groups for the project. To add (a) new group(s), click on 'Add Groups to Project' in the function bar.

3. All groups that can be assigned will be shown on a new blade
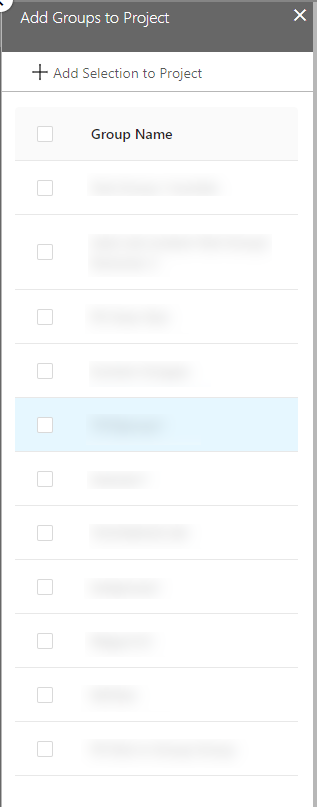
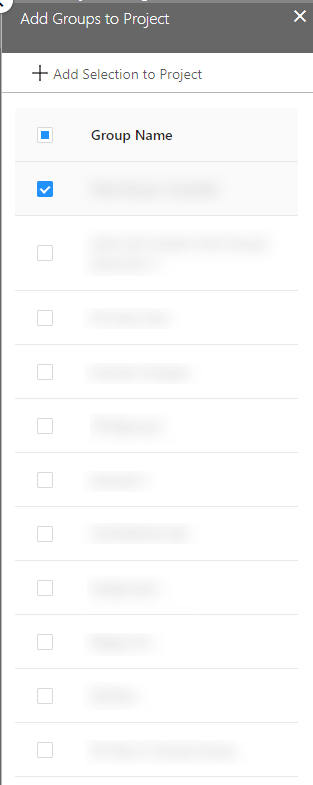
4. Select the group(s) that you want to add to this project. To save the selection click on '+Add Selection to Project' in the function bar.
Remove permissions
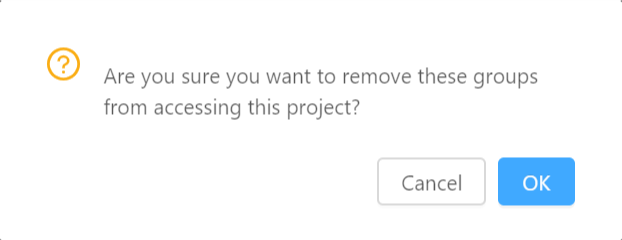
To remove an existing permission, select the group(s) that you want to remove and click on 'Remove Groups'.

A message will be shown that can be confirmed or canceled.
Delete an existing project
To delete an existing project click 'Delete' in the 'Actions' column

or you can edit an existing project and click 'Delete' in the function bar.
A message will be shown that can be confirmed or canceled.
Promote a Project
Smart Knowledge Hub offers a function to promote projects. Promoted projects will be shown in the 'MyHub' section in the WebHub.
If you want to promote a project, you have 2 options:
1. Promote a project over a specific timespan or
2. Promote a project permanently.
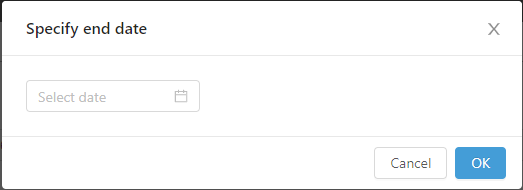
To promote a project, click on 'Promote' in the function bar.

After clicking on 'Promote', you will be asked for an end date for the promotion.
Versioning
SCORM itself is not made to handle different versions of a course. The different versions of a SCORM course even need to be made compatible if they want to handle different versions of learner data.
For cases where SCORM courses could be incompatible to former versions of themselves, Smart Knowledge Hub offers versioning of different Project versions.
Creating a new Version
To create a new version of a Project, just click on the 'New Version' button in the Project list.
This will create a copy of the Project, except the SCORM content package itself.
Please note that only the latest version of a Project will be shown in the Portal. The former version will still remain in its state until you set the new version to be active.
Don't forget to upload a SCORM content package, adjust settings if needed and check it using the 'Preview' button after creating a new version.
Setting the new version active
After making sure the new version works as expected, click on 'Set Active' in the Project List to activate the new version. This will automatically unpublish the former version of the project and publish the new one.
This will also adjust Playlists, the Most important items, Users' bookmarks, Mail Notifications to use the new version.
Please note that deleting the Project is not possible while a new Project has not been set active.
Understanding the status of versioned Projects
The status of versioned Projects will be calculated using the following rules:
- It will show 'Completed' if the status of the current version is 'Completed'.
- It will also show 'Completed', but with a different MouseOver title if there is a valid certificate for at least one of the versions of the Project.
- It will show 'Incomplete' if the status of the current version is 'Incomplete'
- Otherwise, no status or 'Not attempted' will be shown.
Understanding certificates in context of versioned Projects
There is an option 'Enable multiple Certificates' in the Certificate Template, which can be even more useful when combined with versioned Projects:
If users need to renew their certification from time to time, consider using this.
If this option is activated, assignments of Learner Records (not the data itself) will be removed after issuing a Certificate. When starting the course for the next time, users will have to start all over again with the course.